Tuesday, July 13, 2021

Carpet


This, as most things, turned out to be a learning process. I thought my carpet was usable except the trunk.

I had that reversed. The trunk pieces only need a little help, the center tunnel carpet was trashed. Turns out they don't sell separate pieces of carpet, so I had to get a new set. I went with the deluxe carpet set from NW Import Parts, I think it was a fair price.

The first test fit showed there was a noticeable dip in the transmission tunnel so I added two layers of scrap carpet to smooth it out.

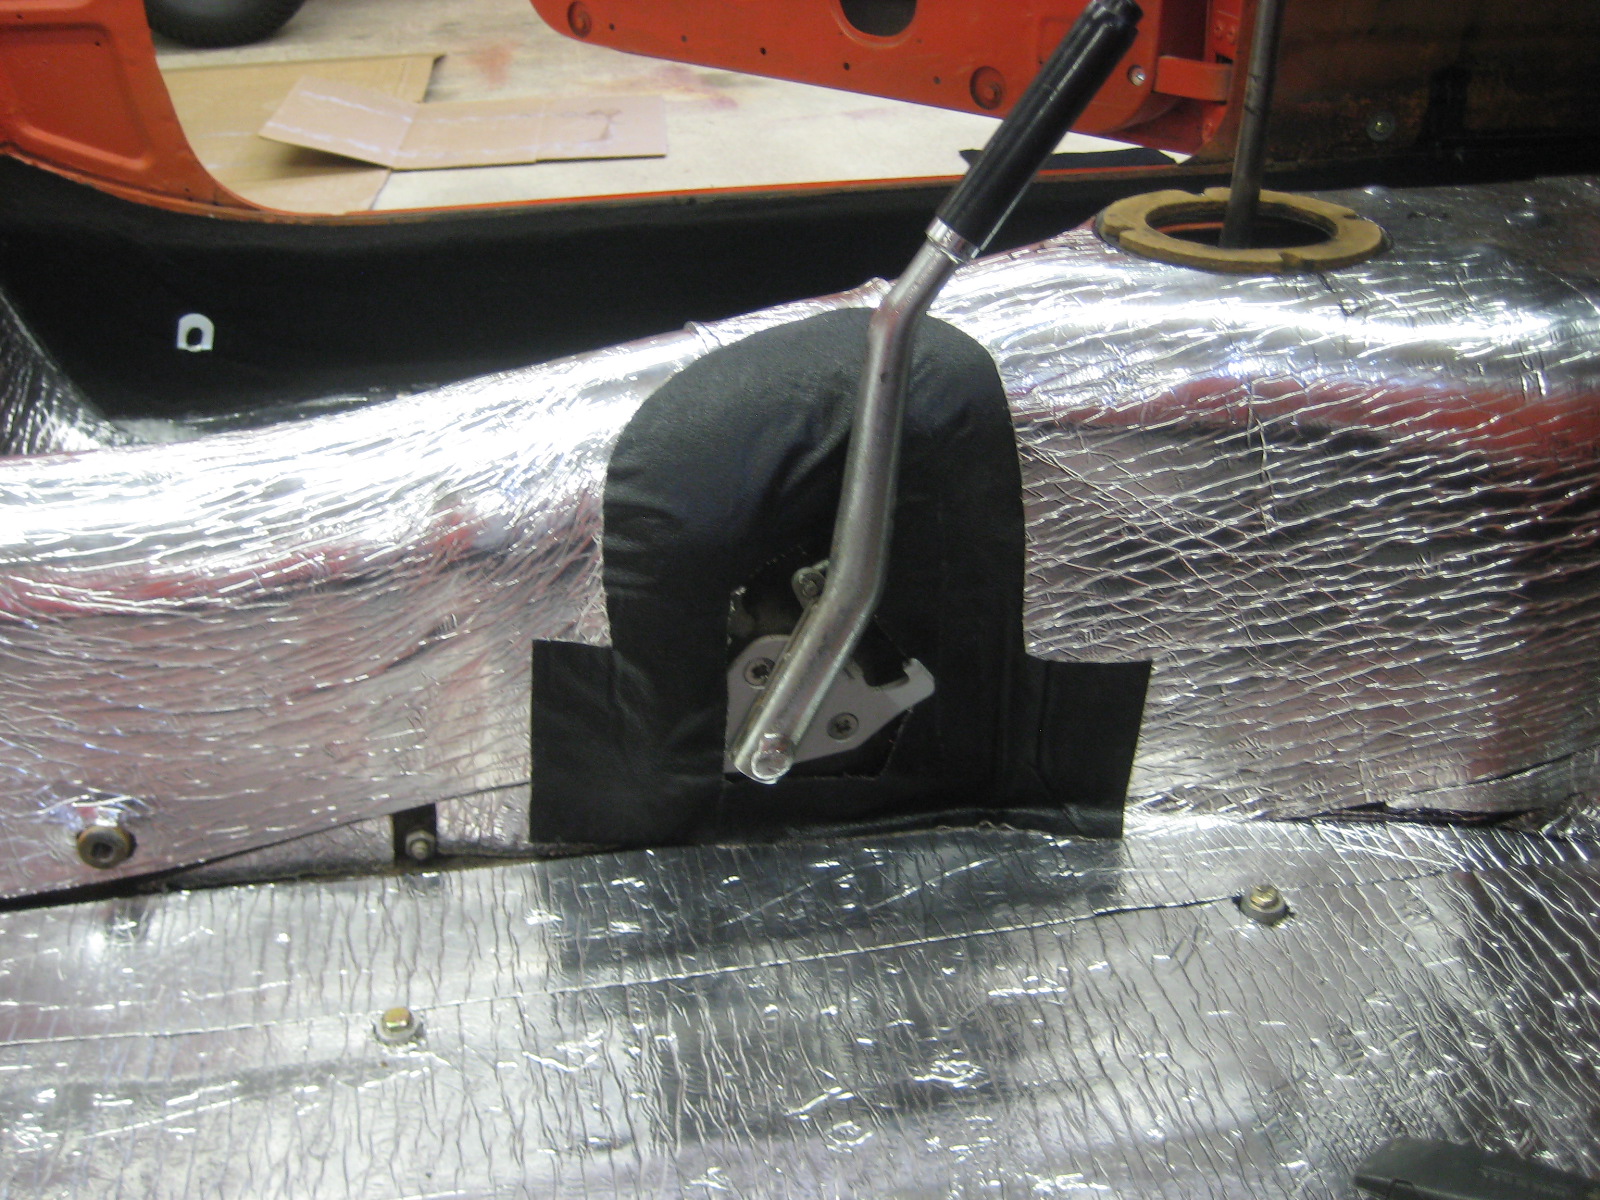
I also had to add a little of that pleather to the hand brake area so the insulation would not show through around the carpet cutout.

The instructions, which I found on MGEXP.com, listed the order which the pieces should be installed, starting with the inner frame rails.

Next was the tunnel. I started by measuring out where the shifter would come through and made a hole in the carpet and insulation that came with it. Then I test fit it and found I was only off about an inch which was fine since I was cutting a 3x4 inch hold around the shifter boot mount flange.

I cut the carpet to match the inside of the chrome shifter trim, and cut the insulation to the outside dimension of the trip piece so it would lay flat. I also drilled the four screw holes to ensure and easy install.

Fits nice and neat and the trim holds the carpet from moving, there is no need to glue the center piece in place other than the bottom edges. This is the look I was going for, I don't like the plastic center console arm rest bits.

The bulkhead behind the seats was a little more complicated since you have to fit the top vinyl piece around the snaps and then glue it all in.

The battery cover piece just lays there and is attached by the four snaps on the forward edge.

The real bear of the job was the rear wheel arches. After an hour of trimming I was able to mark the second piece for the opposite side to shorten the process.

They fit, but there is a difficult seam in the middle, just keep trimming, and then keep gluing and pressing.


Eventually you get there and life is good.
The carpet under the seats isn't going anywhere, so I just cut holes around the spacers that I bolted to the floor before the insulation and carpet was installed.

The front pieces are a pain to reach under the dash, but otherwise not too bad to just glue in. Turns out the outboard kick panels don't get carpet. That is what was in there when I got the car, so I didn't know. I will be making new kick panels that will get covered with the black pleather. Otherwise, I am pretty happy with how this turned out. It took about a day to do, so not too bad. Another two hours to put in the seats and belts, such a pain! Time to drive some more, I am up to 280 break in miles. It is hard to drive very long with the summer heat, best to get out first thing in the morning!

Deploy The Heat Shield


Next, filling in the largest areas possible with a single piece of insulation to reduce seams. 
Eventually you get here. I didn't worry about the inner door sills, not a lot of heat transfer from there, plus too much bulk will make it harder to fit the seats. 

And the back.

I also had to reconstruct the aft bulkhead panel with some new wood and pleather, and thought why not add some insulation there too, so that went on before the cover. Yea, I had to iron in my garage, my wife looked at me a little strange as I headed out of the house with it.  

Looks perfect. Carpet is next.

Monday, June 21, 2021

First Drive and Some Work


Yeah, I had the windshield on for a while already but...

One of the four mounting points stripped when I tightened it. Not over tightened mind you, just tight, or not quite tight enough, then it spun. So out it came, in went four heli-coils, no problem, all back together now.
The battery received a hold down bar, custom made.
I ordered a battery cover seal, a round piece of foam like a long fat string showed up, no way to attach it. I had some self adhesive weather stripping laying around, stuck it on.
Now that is done, of course I had to fix one of the anchors, because nothing is easy.
There were about a hundred steps to get to here, but this is the dash fully assembled on the bench and ready to go in.
Dash in with just two bolts holding it for now, just in case.
And just like that, there are 115 mile on the car. This took me three days with a few things to be tweaked after each outing, but nothing major, it runs perfect, it shifts perfect!
The latest change, a bumper! The pile of parts on the shelf is shrinking rapidly, awesome! Just need to put another 400 miles on the car and then I can change all the fluids.
Center console went in just to hold the wires, oh, and I needed the hazard switch for the blinkers to work.
I have a seat belt, it is not set up perfect, but considering the other, non-existent safety features of the car, that is the least of my worries.
I figured out in the first two miles driving that I needed the shifter gaiter in place, hot air was blowing straight at me from under the car, maybe in the winter that would be okay, but not my preference in June in Virginia.

Friday, June 11, 2021

Seat Installation

This seams like the simplest of jobs, four bolts, easy. Not so fast, putting in a seat can be "not too bad," but it is not easy. Even with no carpet in the car I was was considering burning the whole lot! So here are the steps that worked for me and hopefully the process will go "not too bad" when I do it again with carpet. First step was to clean the rails. The bottom rails slide right off and it is important to clean the top portion where the rails fit together. I used some brake cleaner to get the gunk off. Then I put a light coat of Teflon grease on the rails and fitted them together. Not so fast. If you have both seats out you may have mixed up the rails that fall off. The rail with the stop block bolted to it goes on the outboard side of both seats at the rear end so the block can hit the stop bolt on the bottom of the seat.
 
Next I got 1 1/2 inch long bolts and installed them from under the car in the rear seat mount holes. This will hold the seat in position and in alignment while you start the front bolts. Make sure to put the spacers on the studs so that the rails will be even with the floor. One more trick before dropping the seat in, the inboard rail will fall off when you lift it, and you don't want it falling on your new, or old, body work so zip tie it in place towards the front of the seat so you can easily cut it off once in position. Okay, now you can drop the seat in position. I don't know why there are three holes front and rear on the seat rails but it should only be one or two. If you are tall, definitely install the seat as far back as you can, the studs in the floor should go through the third hole from the back, this will line up the front seat anchor holes with the second rail hole from the front. Cut your zip tie, slide the seat all the way back to the stop on the rail. Now you should have okay'ish access to the front bolts as seen in the first picture. This still isn't easy to reach, but it can be done. Don't forget your 1/4 inch spacer. I used a racheting box end wrench which made it go much faster. Now you can proceed to the rear bolts, which are easier after you slide the seat forward and flip the seat back up as well. Don't use washers on any of the bolts, there is very little clearance between the mechanisms on the rails and the bolts and if they hit you won't be able to move the seat. Maybe just remember to tighten the bolts once a year.  I did this without carpet just because I am not at that point of my restoration, but as it turns out this would have been so much harder to do if the carpet was in the way and the seats were not setup properly first. Good luck if this job is in your future.


First Engine Start After Rebuild

First things first, we need oil pressure and RPM, water temp doesn't hurt either. I have this setup because the dash isn't ready to go in, also the windshield isn't ready. So we will make due.

On the first start attempt the aft carburetor was leaking fuel into the engine, so despite wanting to wait on carburetor rebuilding to ensure an easy start, I had to do it first. This turned out to be a non issue, the only setting to mess with as far as starting it adjusting the jet for richness. Easy, bring the jet flush with the carburetor throat, then back it off two turns, it is easier to count the flats of the bolt so they commonly say back it off 12 flats. The rebuild fixed the fuel problem.

Next I tried starting again and could not get the static timing right, it can be a pain to dial it in even though it seems simple to line up as the manual states. All I can really say is take your time and be patient and methotical.

After all the work, on June 7th it started, 357 days after I pulled the engine from the car. I got the first brake in run done, 2500 RPM for about 25 minutes. This is the suggested break in for the new cam shaft. The oil pressure was holding steady at 60 psi, so all is good. 
 
Here is the engine running for the first time. That whistle is an exhaust leak but nothing more serious happened during the run. After this run I returned the next day and checked the valve lash and ran it again to dial in the ignition timing, and set idle and adjust richness on the carburetors. I am excited to take it for a drive but there is bunch more to do. I kind of need a windshield and dash board, also a seat would be nice. More to follow.


Wednesday, May 12, 2021

Engine Install and More


Time to put this back in.

Add a new clutch, mate transmission.

And in she goes. The trick here is jack the back end of the car as much as possible so that you can tip the transmission into the car with the gear selector installed, this makes things easier down the line, as well as allows you to get under the car to secure the transmission mounts. 

One tip here, if you have the exhaust manifold installed and the steering rack in the car, they will not clear each other. It is close though, just loosen the manifold bolts to let the exhaust sag a bit and you should be able to get it by.
Here is the mount on the transmission support cross member. What did I learn here? Well, first, it is a bad design, but you are stuck with it, so moving on. The rubber buffers go on the cross member first, front hole for standard 4 speed, rear holes for OD trans, tighten them down, you can't reach them later. The Butterfly is installed with pointy side to rear, which will make sense if you have these parts in your hands with a confused feeling. Next, put the bottom bolts into the cross member loosely and then attach the butterfly to the transmission leaving those bolts loose. Now the fun part, put the four supporting  bolts through the cross member into the car frame, they probably won't line up well, you can do yourself a favor and run a tap through the threads just make sure you are starting with clean captive nuts. Installing the bolts will take some prying and swearing, but it will happen. Now just tighten everything up, the front bolts on the rubber mounts will take some time, be patient. Finally you can put on the forward brace if yours has one. 

Next the exhaust down pipe can be bolted up, this is a new stainless steel one, the rest of the exhaust is in much better shape than the old down pipe, so I will reuse it. 


The drive shaft should be installed the same way it came out, so hopefully you have marks on the flanges to match up, this will ensure better balance of the rotating parts. Also on the spline and shaft there are arrows stamped on the metal so that you can put the shaft back together as the factory intended.

Oil cooler back in, easy.

Oil filter. Things are starting to feel like they are coming along now! Alternator back in place, belt installed!!!

My original brass radiator was in good shape so I am reusing it. Just cleaned it up with vinegar and baking soda and then touched up the paint, pretty easy.

Important not to forget oil in your new engine! Factory recommended 20W-50 plus some ZDDP additive for break in. 

No, I did not skip ahead, the dash is only resting on the cowl, but the tach and oil press gauge are connected, yes that is oil pressure you see! Big day, the engine cranked over very nicely and built oil pressure, very exciting!!!

No spark initially, just required splicing a broken wire and all good!

I know this car looks a long way from needing a license plate, but I just wanted to show off the new bling. But, I think this car will be moving under it's own power within two weeks. The reason I haven't started the engine is the exhaust is not on yet. The exhaust is not on because the new axle straps broke immediately, so I am waiting for the new and improved ones from Strapping Lads Shop. The axle sits right behind the exhaust right now without droop straps installed, so I wait. Once the axle and exhaust are complete all that is needed is to hook up the fuel line and crank it over. Fingers crossed. One more note, after some advice from MGEXP.com I have decided to leave the carburetors alone until after I get the engine started, then I will pull them and rebuild them. This is more work but eliminates some variables if I have trouble with the initial start up since it was running when I pulled the engine.